Showing posts with label family. Show all posts

Tuesday, 3 April 2012

Meadow Party

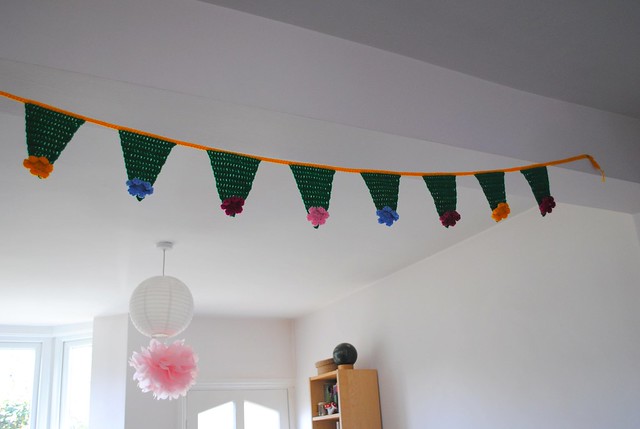
Flower bunting

On Saturday Lillia turned 6 and had a "meadow" themed party at home to celebrate.  There were far too many sweet treats of course, with a few carrot sticks and cucumber slices thrown in to balance it out a bit. But most of all there were plenty of games and fun. I had a lot of fun making crochet bunting and other little decorations. The flower bunting above was inspired by this tutorial and it was perfect for a meadow theme.

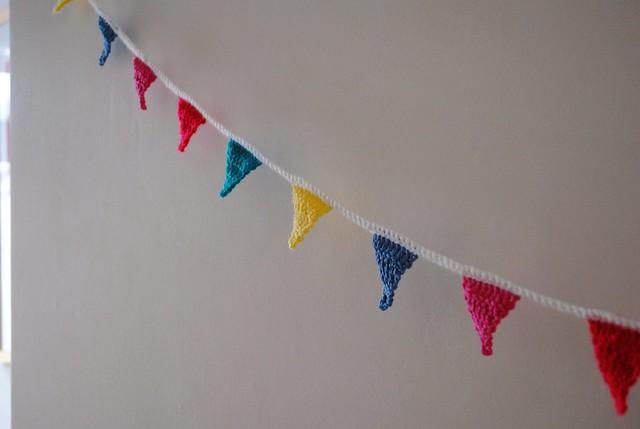
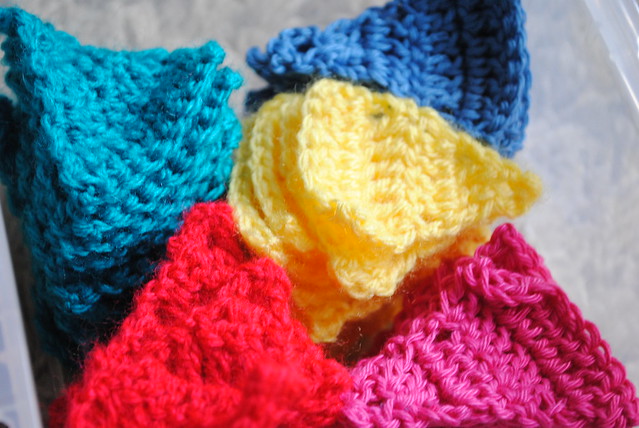
I made up the pattern for mini bunting and used yarn left over from other projects to make it...

Mini bunting

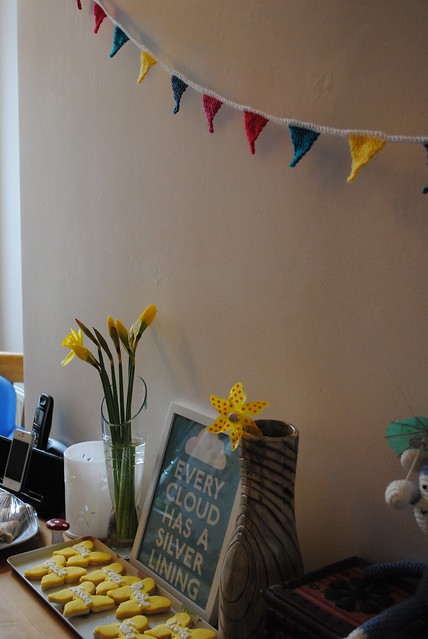
I was very pleased with this, I really love the colours. In fact all the bunting is still up! I don't think I will take it down until well after Easter is done :) As well as bunting there were many bunches of cheery daffs dotted about the place looking festive...

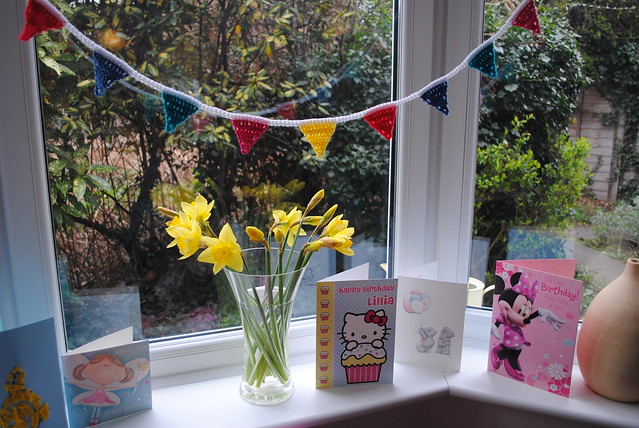
Bunting and daffodils

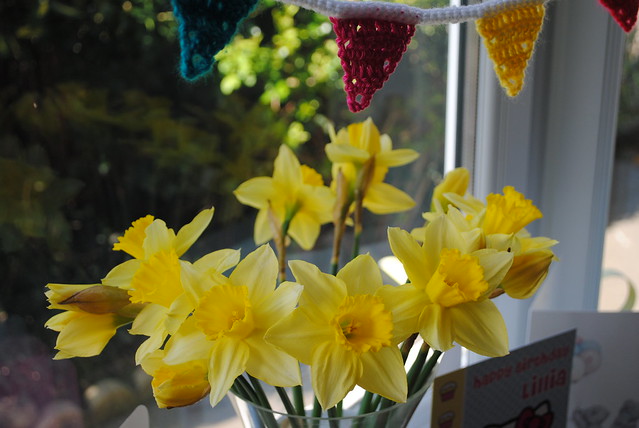
I love daffodils. Yellow is my favourite colour and they are only 99p a bunch, so at this time of year I can afford to have fresh flowers in the house!

Bunting and Daffodils

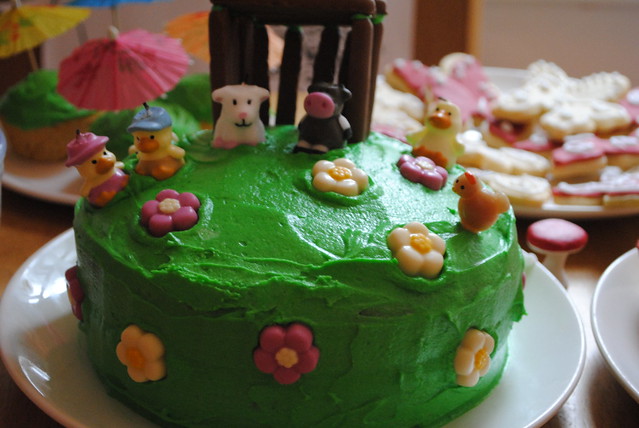
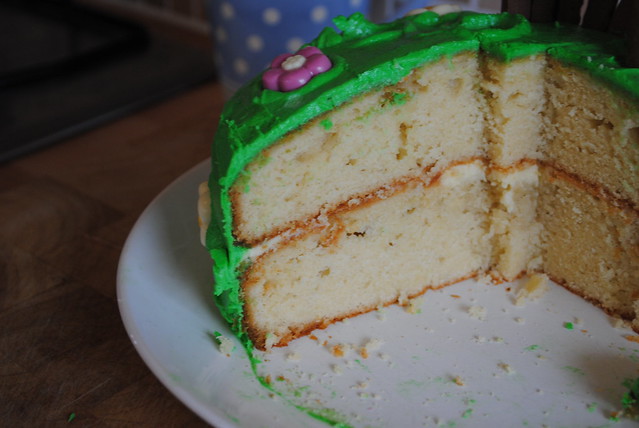
I made a meadow cake of course...

Meadow cake

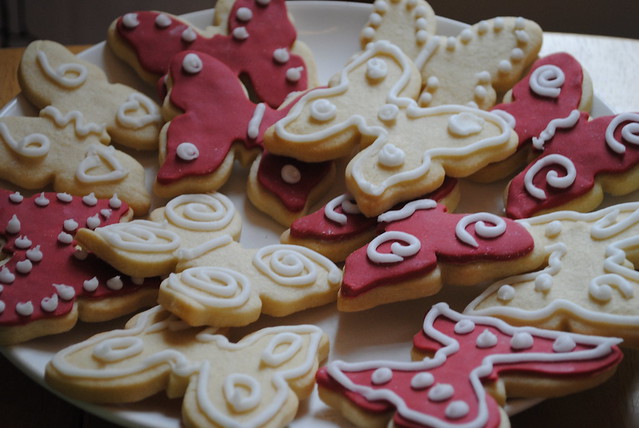
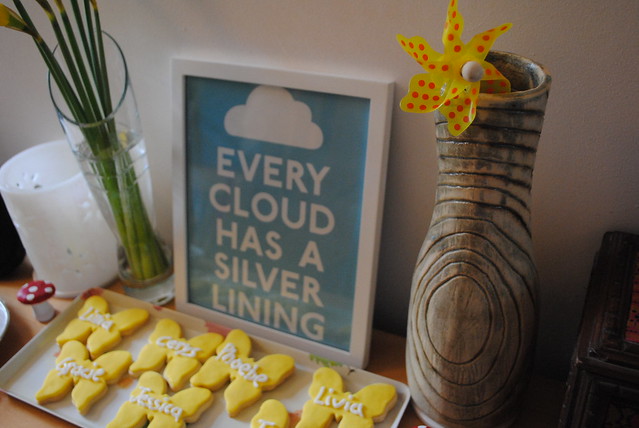
And I also made plenty of butterfly biscuits...

Butterfly biscuits

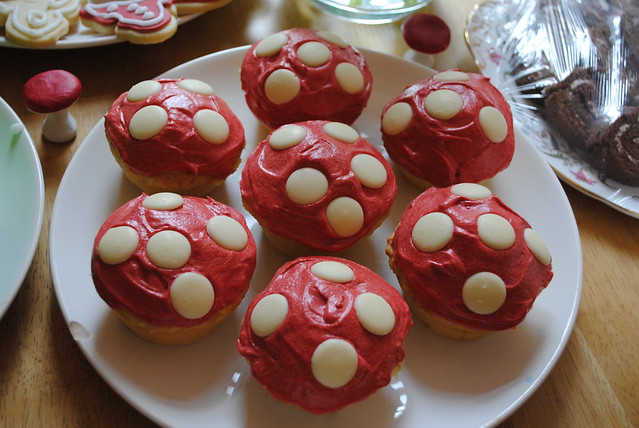
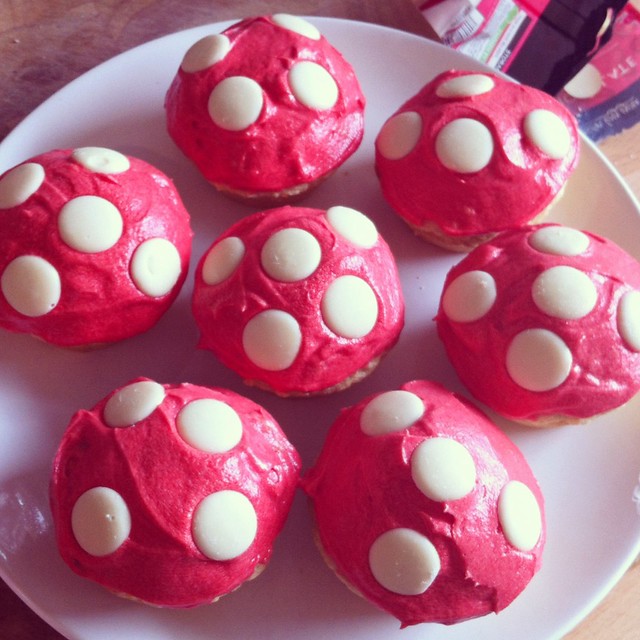
...and toadstool muffins...

Toadstool muffins

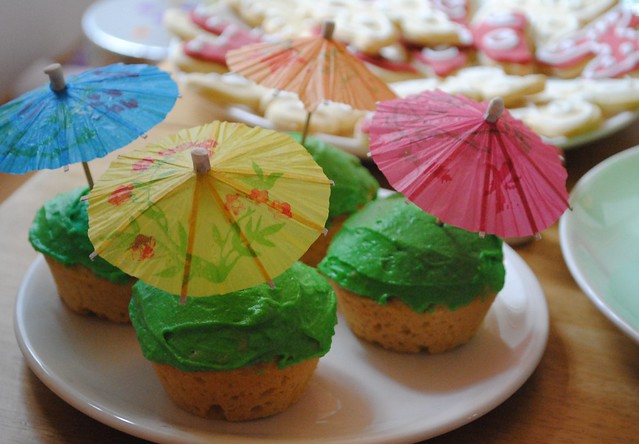
...and faced with leftover green buttercream icing I decided to create some "meadow muffins" too...!

Meadow muffins

Honestly I think I had eaten a ton of buttercream before 10am just from the odd lick of a spoon or finger! Myum myum! Good job Lillia was too busy making fairy rings using pink helium balloons to notice.

Every guest had their own butterfly biscuit

Every guest had their own butterfly cookie with their name piped on in icing, and we had little colourful windmills scatted about as well as in the party bags. They looked so pretty poking out, I totally forgot to take a photograph of them all lined up, it was just all so manic getting everything ready!

Bunting and daffodils :)

The vase holding the yellow windmill is one of mine by the way, do you like it?

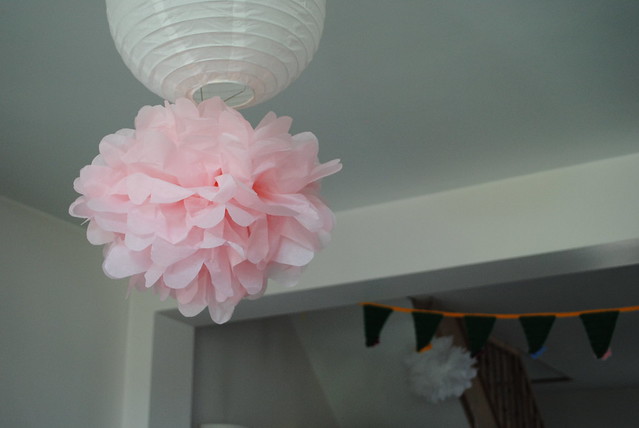
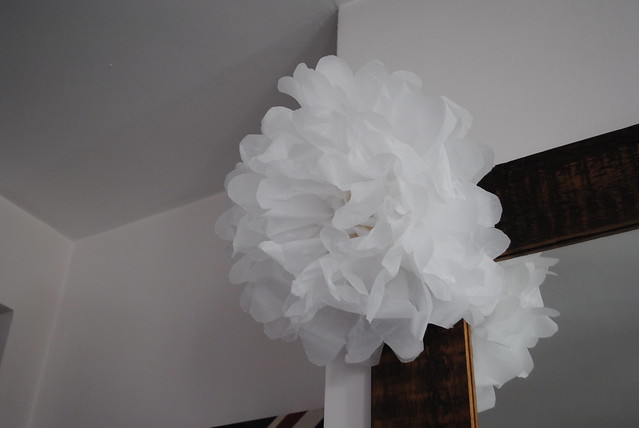
Then of course we had our paper pom poms adding the finishing touch...

Pink paper pom pom

White paper pom pom

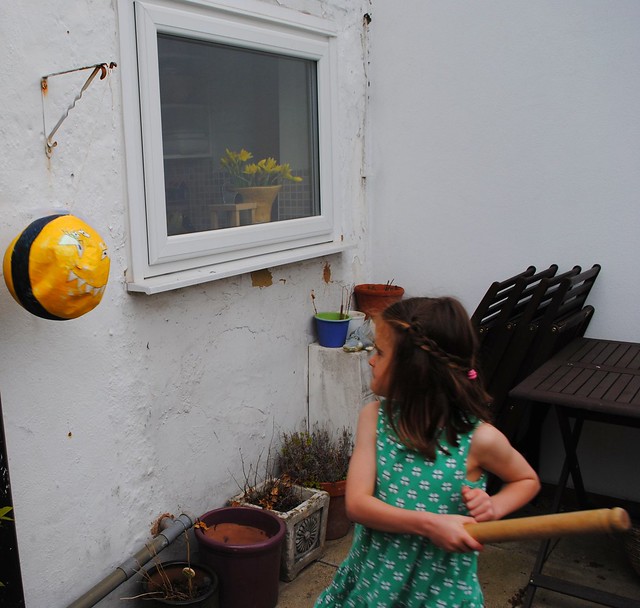
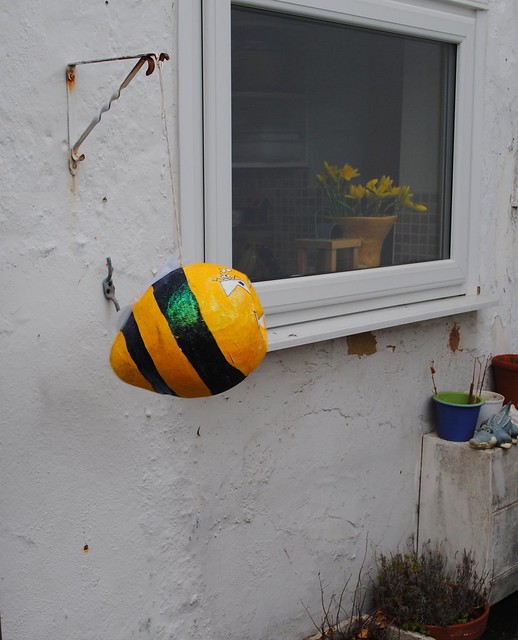
We played Pin the Tail on the Cow, musical statues, musical bumps, Pass the Parcel, we had an Easter egg hunt and then there was Wally the Wicked Wasp - our homemade pinata! Sadly I completely forgot to take a proper photo before he was smashed to a pulp by 6 sugar-fuelled 6-year-olds with a rolling pin. But here he is in action...

Wally the Wicked Wasp - our homemade pinata!  Wally the Wicked Wasp - our homemade pinata!

Lillia didn't want the pinata to be anything she liked, like a bumble bee or a toadstool, as she didn't like the idea of whacking it otherwise! Bless her. So a wicked wasp was the solution! He was stuffed full of chocolates and party blowers, they had a great time!

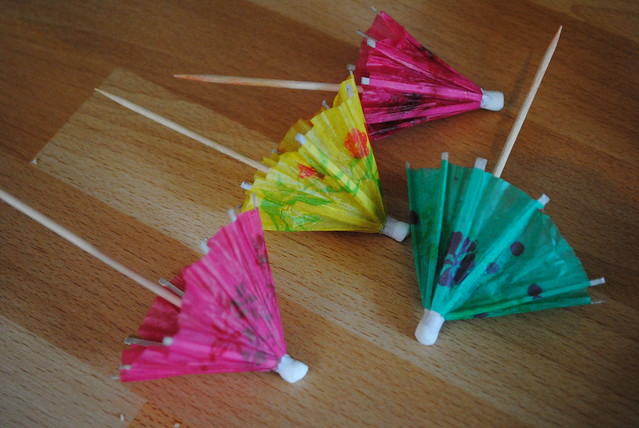
Cocktail umbrellas

It was a tiring but lovely day.  Lillia had a wonderful birthday, I just can't believe she is 6-years-old.  Where did that time go?

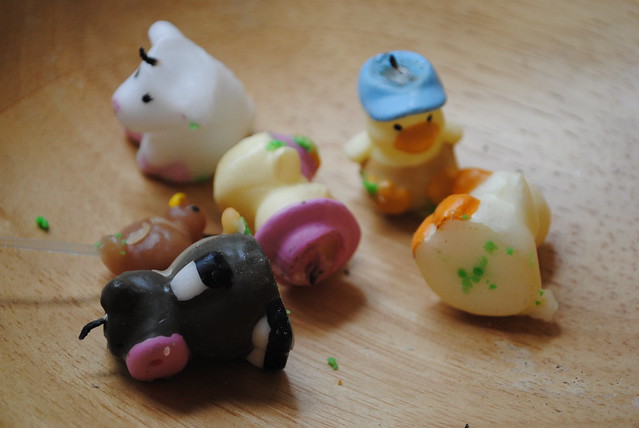
Animal candles

The meadow cake went down well!

There is still a bit of cake left so I best get on and help with the eating of it, might be some wine left somewhere in the fridge too :0)

Happy Birthday Lillipops
xx

Sunday, 18 March 2012

A day for the mummies

Happy Mother's Day everyone...I trust you were all spoiled? I certainly was with a good lie in (needed after a few glasses of muscadet in the local last night), then a cup of tea and pancakes in bed, lovely cards, cuddles and a couple of lovely little thoughtful gifts.

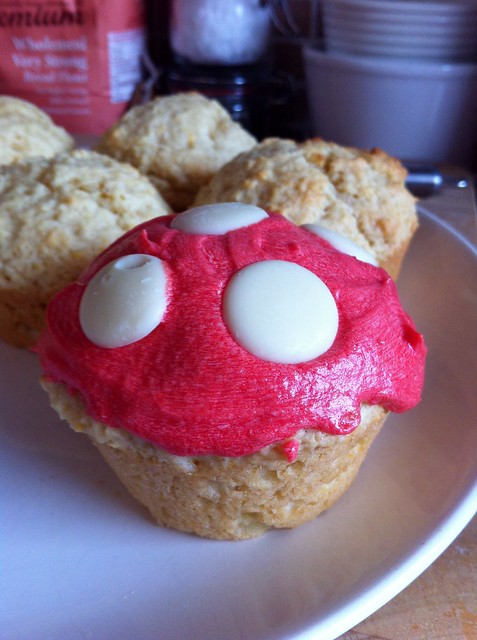
I've also had time this weekend to experiment making some toadstool muffins for Lillia's upcoming 6th birthday "meadow" party.

Toadstool muffin

I found some professional food colour that colours butter icing really well (didn't want a repeat of the dead salmon cake) and I used white chocolate buttons for the toadstool spots.  What do you think?

Toadstool muffins

These are actually orange muffins with orange buttercream icing.  You only need to eat one of these, my goodness they are delicious but filling! I am rather pleased with how they came out and I think they will make a very whimsical addition to the meadow-themed food :)

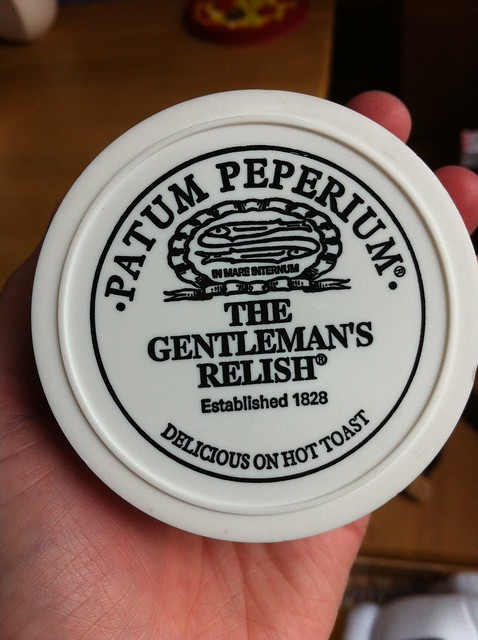
For mother's day lunch we went to my mum's and prepared her a buffet style array of goodies.  We tried Gentleman's Relish for the first time, not sure I'll be in a hurry to try it again!  Rather...um...salty...and fishy, very fishy. Blergh.  Nice pot though...

Gentleman's Relish

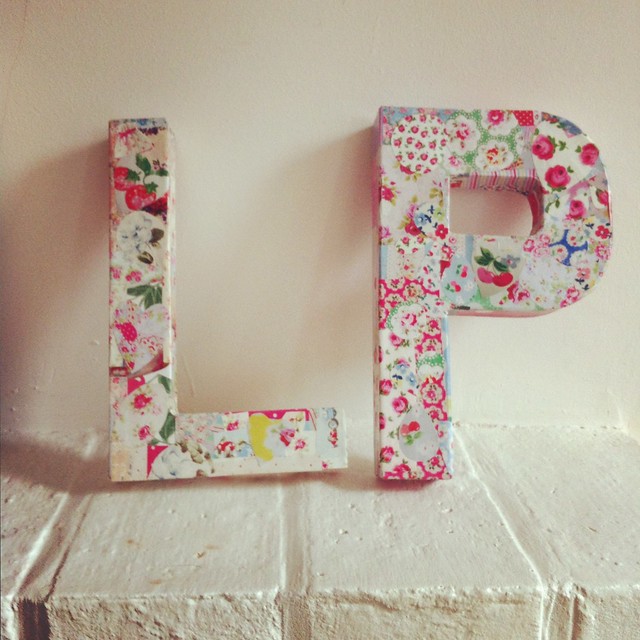
Amidst the mother's day lunching, fish paste sampling and muffin making, I have also had a chance to attempt something I've been wanting to do for some time - my own version of decopatching...

My own take on "decopatch"

Papier mache letters from Hobbycraft decorated with ripped up pages of the Cath Kidston catalogue stuck on with PVA glue.  This is just a sneak peak, more on this in another post soon! 

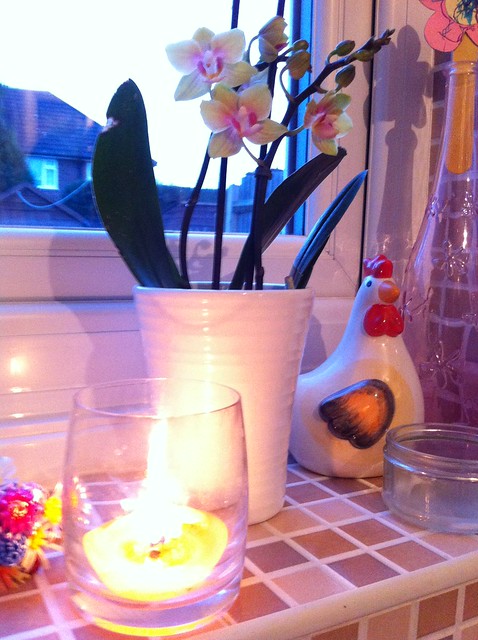
Well, it's been a long weekend so I am going to enjoy my orchid and my chocolate-scented candle, perhaps partake in a little Ben & Jerry's cookie dough and have a very early night.


Sunday evening

Happy Mother's Day everyone x


Thursday, 15 March 2012

London in the Spring

There is no denying it now - the air is noticably less nippy the mornings are lighter, the evenings slightly longer, there have been sunshiney skies and a few rain showers.  Spring has definitely arrived. 

I do love this time of year.  Birthdays galore, daffodils, freshness and the smell of wet mud. Luv-er-lee.

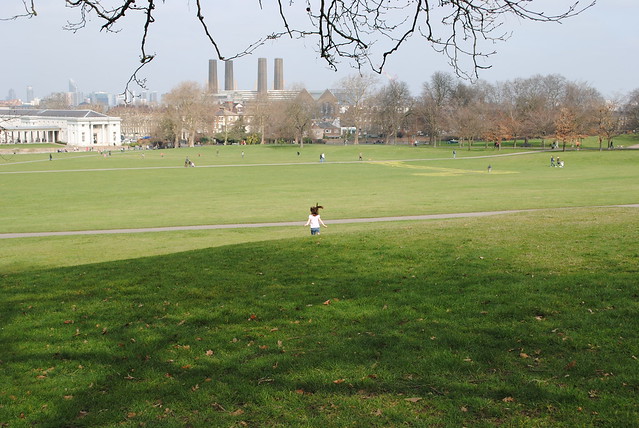
On Sunday we decided to take advantage of the Springy weather and took a trip up to Greenwich to walk around the park amidst the neat old buildings and shiny new cafes and museums.  The skies were blue, the air was fresh, we even walked about without our coats on!

Greenwich March 2012

Greenwich March 2012

Lillia loved being able to run about in the wide open spaces and play hide and seek amongst the trees...

Greenwich March 2012

Greenwich March 2012


Although suggesting we play hide and seek here was probably not one of our finest suggestions...

Greenwich March 2012


:)

We huffed and puffed our way up the steep hill to the observatory (you have to pay to get in these days!) and looked back down towards London...

Greenwich March 2012


Greenwich March 2012

It struck me as strange standing there so content with my little family, enjoying a relatively lazy day together, taking in the rather impressive view - when in fact I was looking towards the route of my car journey to work that causes me so much anguish.  The route that runs from the right by the Dome, past Canary Wharf and into the distance to the Gherkin.  I drive this three times a week before 7:30am, and back again in the afternoons.  It takes me away from my girls, my home and my sanity.  It was strange to look down on it from a distance and think about that.

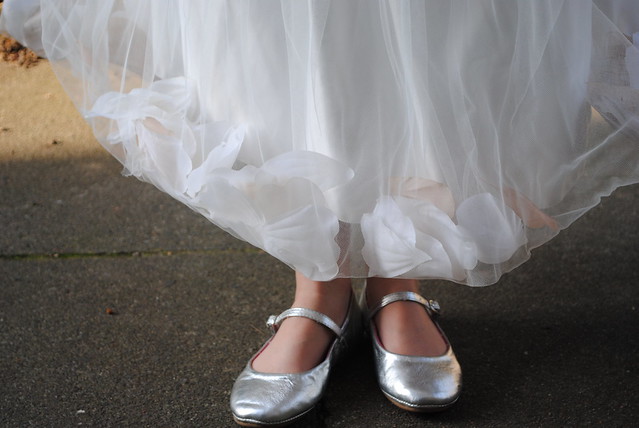
After a pizza lunch we headed home, picking up some bridesmaid dresses along the way.  Lillia is to be a flower girl this year and I promised my friend I would take pictures of the various dresses she wanted her to try.  I took photos outside the front of the house, and they came out beautifully in the afternoon sun...

Trying on dresses

Trying on dresses

I can almost smell the roses and hear the clink of champagne glasses can't you? 

Monday, 12 March 2012

Luna the Unicorn and crochet flower bunting

Amazing how the weeks skip by isn't it?  Life here in the snipsnaphappy household has been manic to say the very least, I am beginning to wonder how anybody mixes work and family life as I am finding it near on impossible to be a mummy at the same time as being an employee all whilst attempting to make sure everyone has clean clothes and the house doesn't crumble under the weight of dust and grime.

We live in such a small house (really, it's teeny) that I have to stay on top of clutter and mess at all times or we just won't get in the front door - but how am I supposed to do this when I leave the house at 6:15am three days a week?  Mind boggling.

Enough of my grumbles though.  Amidst all the daily mayhem I have still had to make some time for creating - with Lillia's 6th birthday coming up very soon I have been hard at work making presents and decorations.  She wants a "meadow" themed party, so lots of bunting, animals, flowers, butterflys and toadstools are the order of the day. I have made flower bunting and mini bunting so far...but more on those in another post. Here's a wee sneak preview though...


Mini bunting in progress

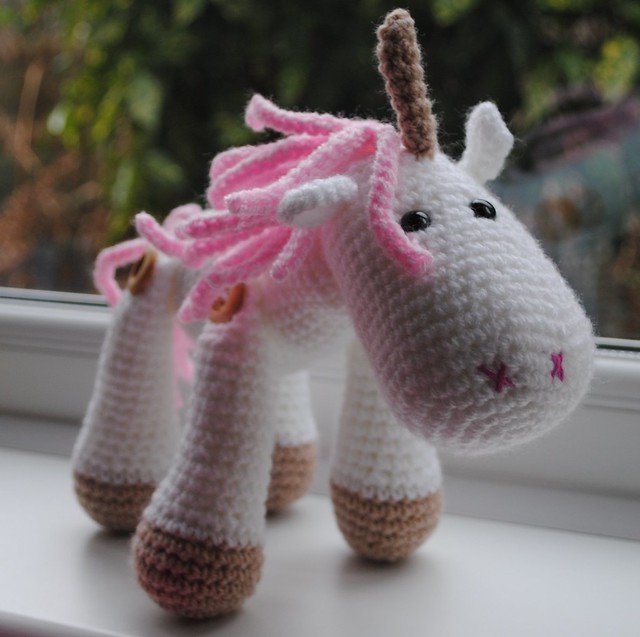
Then of course there's the annual handmade present that Lillia chooses.  In previous years we have had the Pink Ripple Blanket and the Patchwork Scotty Dog and Mr Skelly, this year she wanted a crochet unicorn.  I found the perfect pattern on Etsy and made Luna the Unicorn...

Luna the Unicorn 10

Luna the Unicorn 3

I rather love Luna, the pattern was great fun to do (I never used to understand it when people described a pattern as "fun" but this really was, nothing too fiddly, lots of new little techniques to learn, it really was fun...)

Plus she came out really cute, Lillia is definitely going to love her.

Luna the Unicorn 8


For now though she is hidden away in the ottomon in our bedroom, waiting for the Big Day :) 

Thanks to everyone who took part in our recent swap!  I have some beautiful gifts to share with you this week!  Except, I may have eaten one of my gifts...oops...

x

13th March 12 - Edited to add: Forgot to mention that the pattern for Luna the Unicorn is from this shop on Etsy!

Monday, 20 February 2012

Mug Cozies

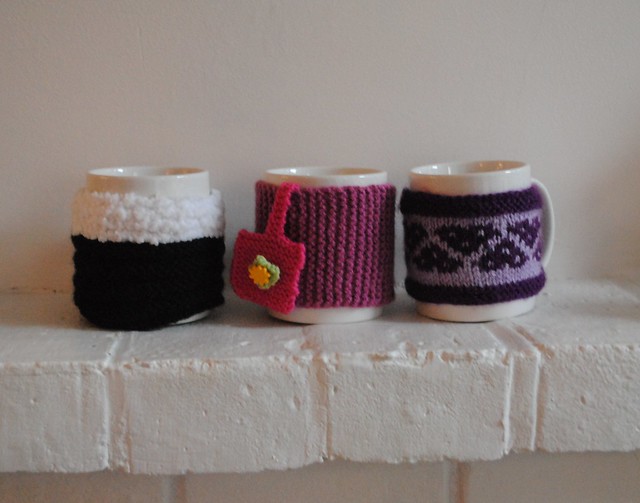
Just a very quick post from me today - wanted to share with you these mug cozies that my mum made us!

Mug Cosies

The left-hand one is supposed to be brown and white to represent hot chcoolate I think, but she made it with black for hubby as he likes guinness :)
The other two are all mine!  Pretty aren't they?  ~ slurp ~

x

Saturday, 18 February 2012

Half Term

It has been half-term this week so we've been enjoying some time together and some time off from the usual routines.  Early morning rushes and daily spelling practice have been replaced with leisurely colouring sessions, playing games and watching DVDs (favourites at the moment are Robin Hood and Tangled).

Lots of colouring

Lots of colouring

I did have to work on Monday and Tuesday, and I have had to check in most days to make sure everything is ok as it's just so busy at the moment.  I find it hard to be everything at the same time - employee, mother, housekeeper, all-round entertainer and provider of boredom-busting activities.  It's kind of exhausting.

Lots of colouring

But I am happy to be with my two girls every day, and I love being at home and being able to potter about tidying drawers here and there, playing Guess Who, arranging books on shelves, grabbing a bit of time to crochet here and there.

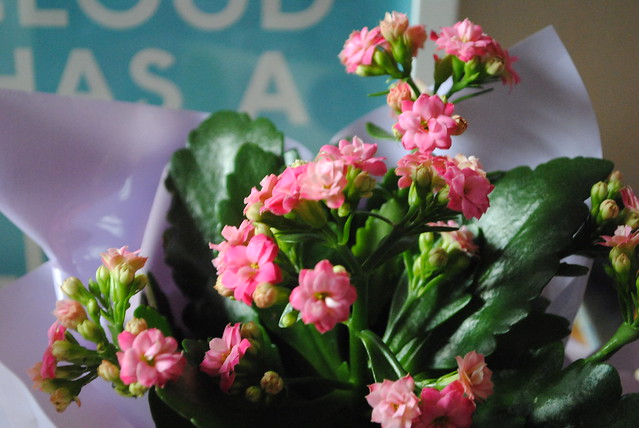
Flowers

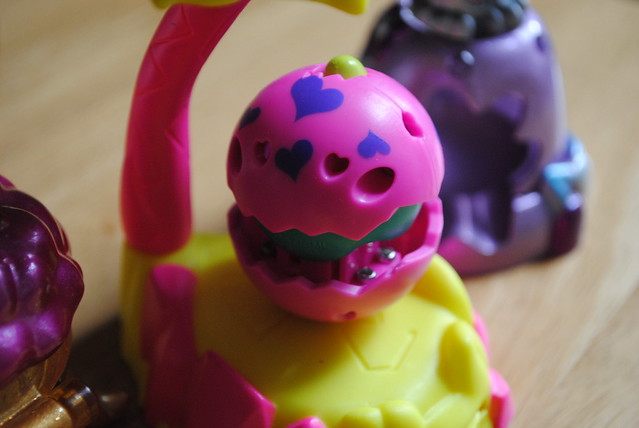
Lillia is very much into zoobles at the moment so we've played quite a few games with those.

Half-term zooble fun :)

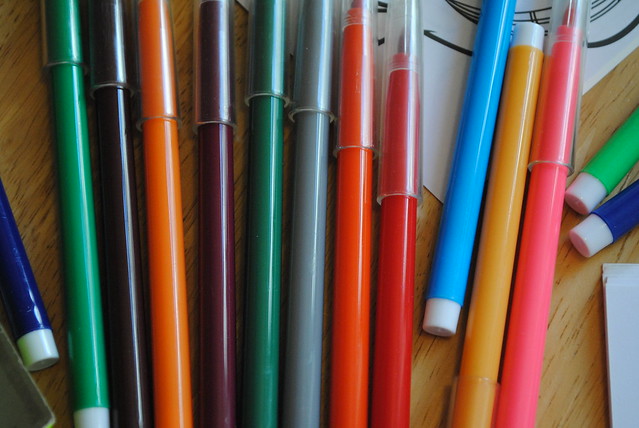
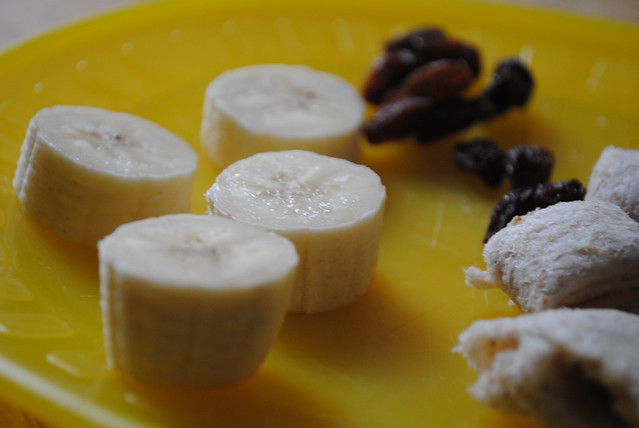
And Phoebe is into breaking and entering - getting into the cupboards she shouldn't, removing felt-tips she shouldn't, grabbing TV remotes, opening drawers.  So meal times, when she is safely contained in her booster seat, provide five minutes of welcome (if messy) peace!

Snack time!

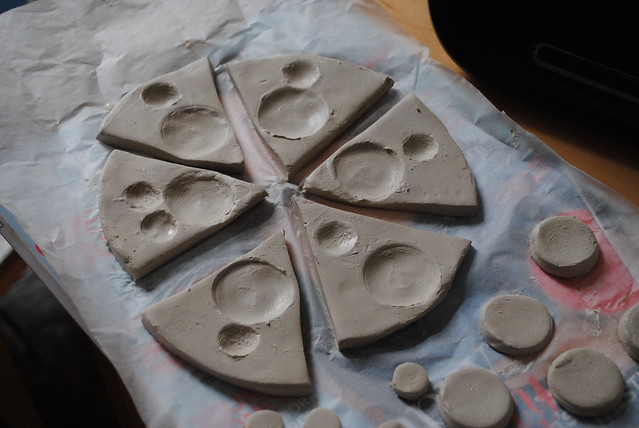
Lillia is more into "arts and crafts" as she calls it.  So we have been recreating the "puzzle pizza" she saw on Art Attack...

Making the Art Attack Clay Pizza puzzle

Lots of games, lots of time together, lots of mess.  But happy days.

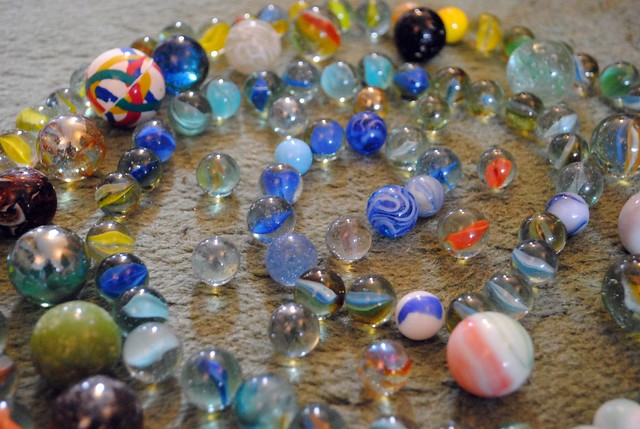
Playing marbles

Back to school on Monday and peace will reign again, at least between 9 and 3 :)

Friday, 10 February 2012

Throw Cushion (or pillow) Tutorial

I wanted to share with you my instructions for making a small throw cushion (or pillow)...

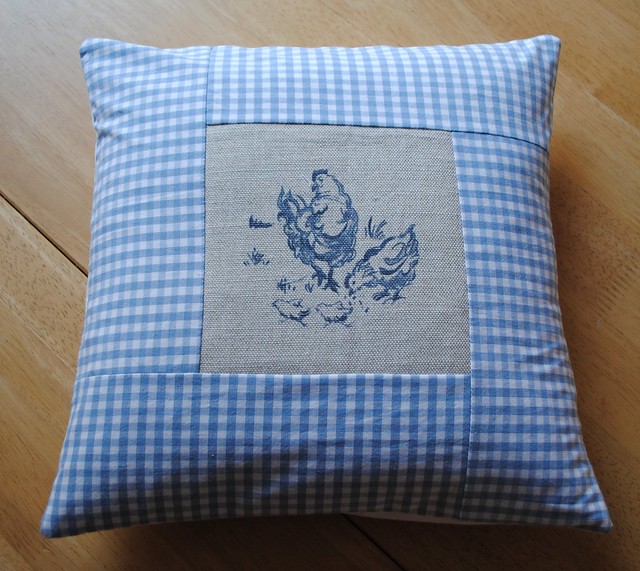
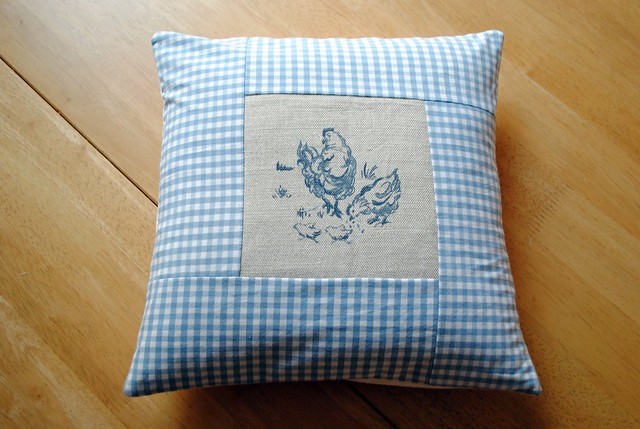
35. The finished cushion!

Cute isn't it?  I have quite a stash of interesting fabric and this chicken one I bought over a year ago as a fat quarter on eBay.  I bought it with my sister in mind - she keeps ex-battery hens and is a bit of a sandal-wearing-animal-loving-vegan geek (except with fabulous shoes instead of sandals) so I knew she would love it....I just had to think of what to actually make with it.

Then I came across some dinky little cushion pads and I knew then that the chicken fabric would become a cushion!  I knew I wanted the print to be the central motif with a border around it in a kind of spiral.  It took me aaaaages to work out how to do this, I am sure there must be an easier more professional way out there, but the way I worked out is actually pretty simple.

This is a really simple little tutorial, even if you are new to sewing. It is small at only 30x30cm and there are no tricky zips or buttons to contend with :)
So, here we go...

Throw Cushion Tutorial

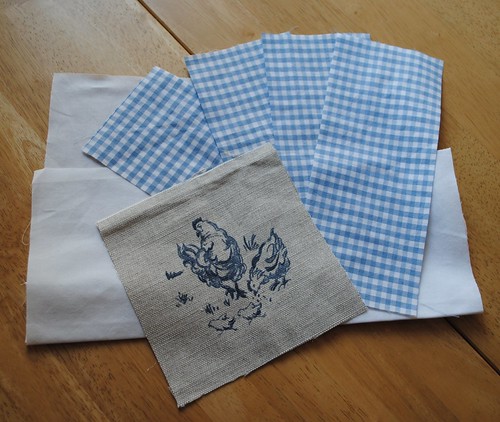
You will need:
  • 1 cushion pad measuring 30cm x 30cm (mine is from Dunelm Mill)
  • 1 piece of your feature fabric measuring 13cm x 13cm (mine is the chicken fabric)
  • 4 pieces of your border fabric, each measuring 22cm x 10cm (mine is the blue gingham, which is organic cotton and bought here)
  • 2 pieces of your backing fabric, one measuring 18cm x 31cm and the other measuring 23cm x 31cm (mine is the white fabric, also organic cotton from the same place as before)
  • Thread, scissors, pins and sewing machine (or just a sewing needle of course!)
Start off by cutting out all your pieces and ironing them...

1. Cut out and iron all your pieces

Just a note -  I wanted to make sure my chicken print was nice and central.  I did this by cutting out a 13cm x 13cm square from a clean sandwich bag.  I then placed this over the print so I could make sure it sat in the correct place, marked the corners then drew the lines with tailor's chalk before cutting out with a rotary cutter.  It worked for me!

2. This is how I made sure the print on my feature piece was centred :)

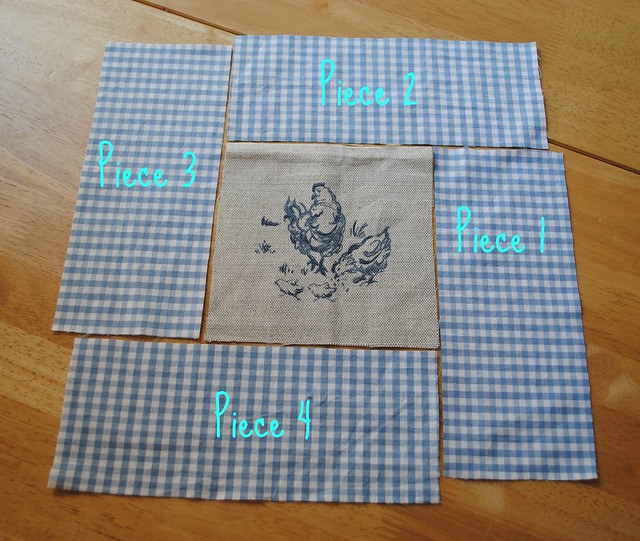
So now let's assemble the front of the cushion. Your pieces will be laid out like this together...

3. Time to assemble the front

I have numbered the pieces so you can see clearly which piece is which as we continue along.

Take Piece 1 and pin it (right sides together) to the right side of your feature piece...
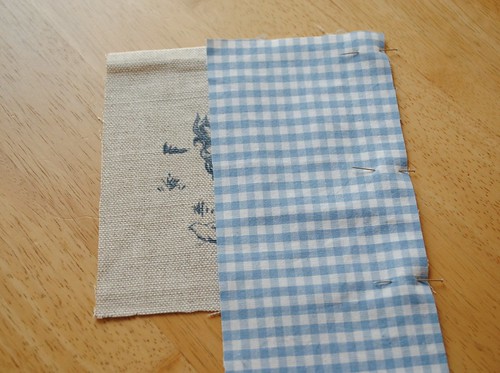
4. Piece 1

Now sew from the top to about two thirds of the way down your feature piece...
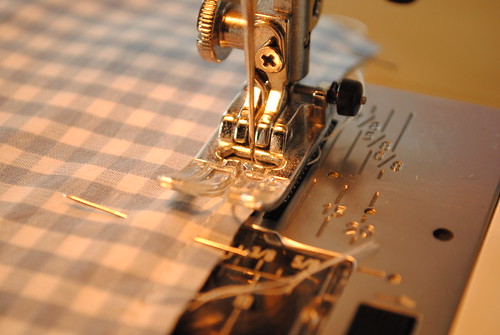
6. Piece 1

You will want to have sewed about the same as I've marked below...
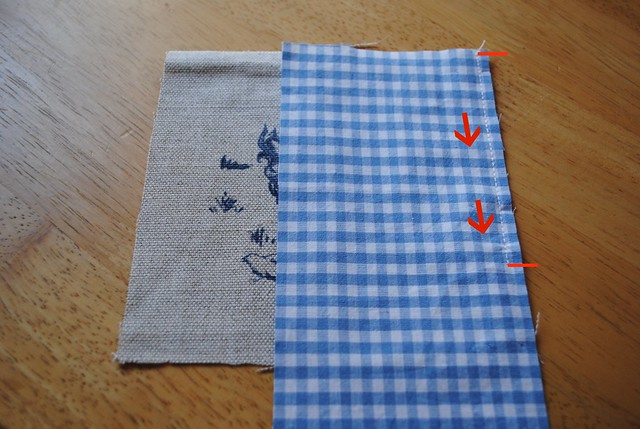
5. Piece 1

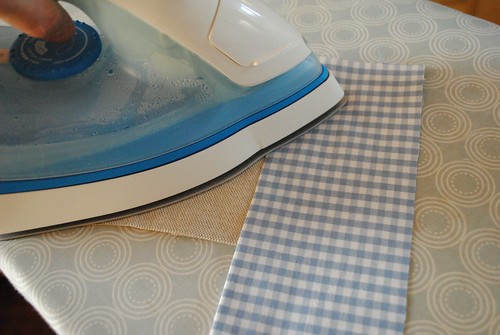
Now iron it all nice and flat...

7. Piece 1


Next take Piece 2 and pin it right sides together along the top of your feature piece and Piece 1...
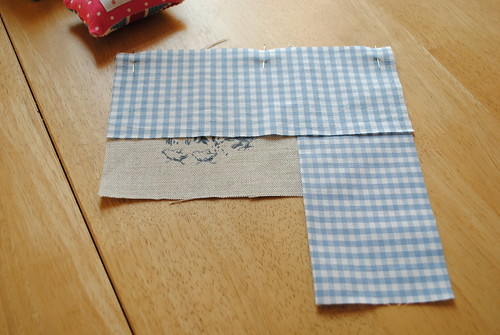
8. Piece 2

9. Piece 2

Now sew it all the way along, then iron it nice and flat...
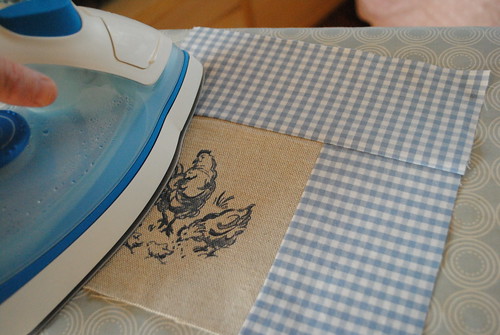
10. Piece 2

Make sure you give both sides a good flattening!

11. Piece 2

Take Piece 3 and pin it right sides together along the left side of your feature fabric and Piece 2...
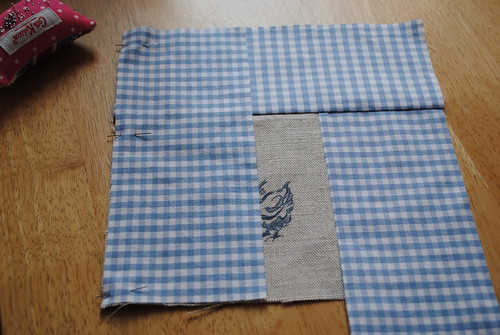
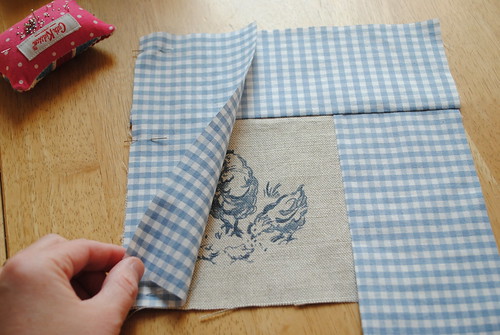
12. Piece 3

13. Piece 3

Sew all the way along then...yup you've guessed it...give everything a really good iron...
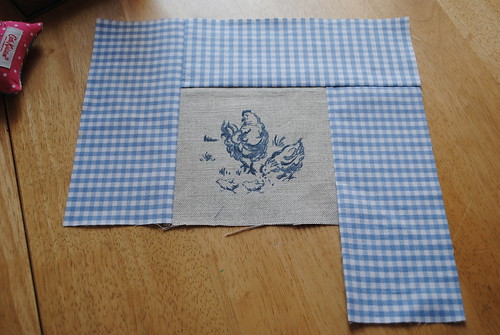
14. Piece 3


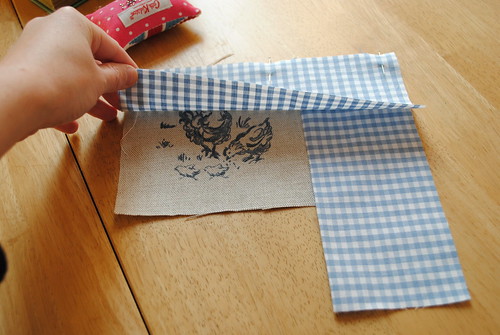
Take Piece 4 and pin it right sides together along the bottom of your feature fabric and Piece 3.  Make sure you move the unsewn part of Piece 1 out the way while you do this...
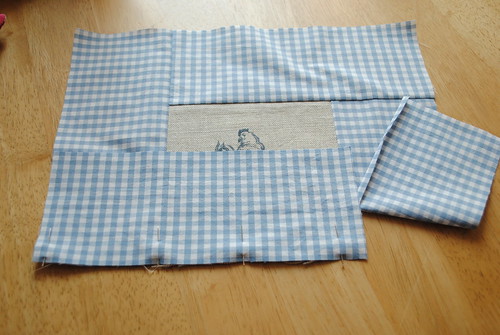

15. Piece 4

Now sew all the way along as before making sure that unsewn bit of Piece 1 is out of the way.  Then give everything a good iron.

Your front piece now looks like this with all the parts sewn together apart from that one flappy bit that we left unsewn on Piece 1...
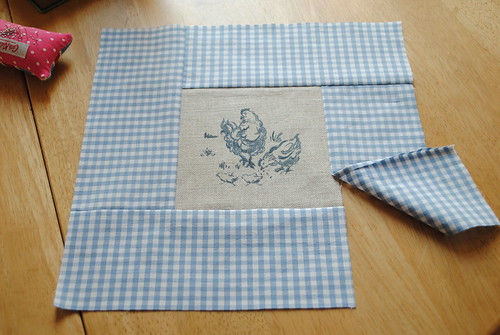
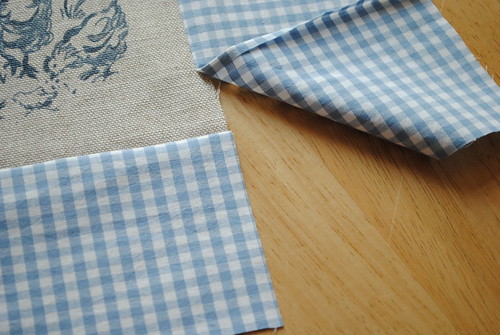
16. Piece 4

17. Finishing Piece 1


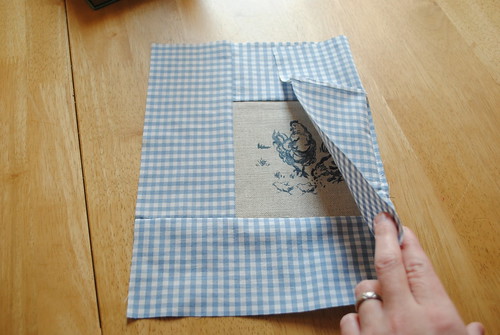
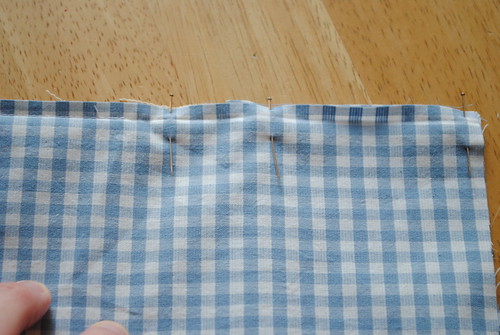
Now for the tricky bit!  Though to be honest it really isn't all that tricky:  Fold Piece 1 back over so it sits right sides together against your feature fabric and Piece 4.  Line up the edges and pin it all together.  Make sure it's all neat and flat...
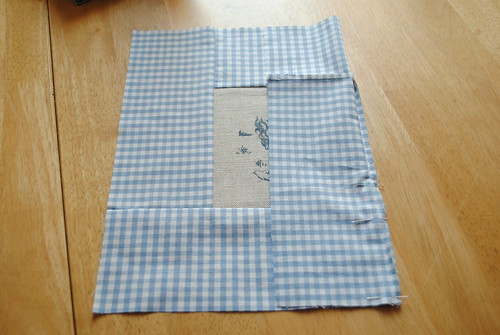
18. Finishing Piece 1

19. Finishing Piece 1

20. Finishing Piece 1

Now start sewing from where you left off earlier and all the way to the end to fully attach Piece 1.  Then give everything one final good iron...
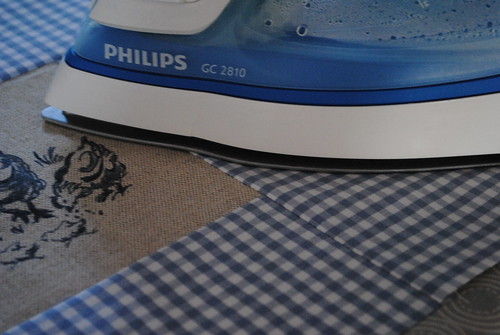
21. Iron everything!

If you have managed to sew everything pretty accurately it should all have worked out rather nicely and look something like this!..
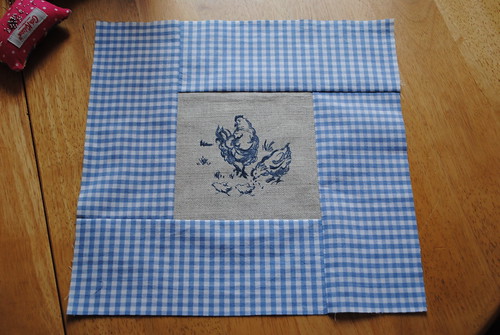
22. The finished cushion front

Trust me if I can do this anyone can, I am the least accurate seamstress EVER!  It does help of course that I am using gingham fabric as it does wonders for helping you to sew in straight lines :)

Ok. that's the hardest work done!  Time to whip up the two back pieces.  Take one piece and fold one long edge (the 31cm edge) over by 1cm and iron it down...
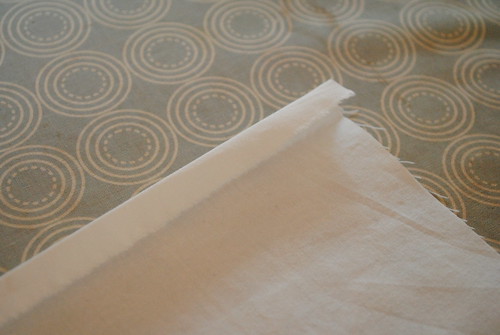
23. Making the back pieces

Then turn it over another 1cm (to hide the raw edge)...
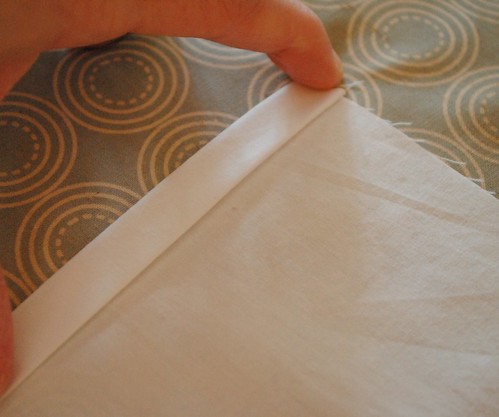
24. Making the back pieces

Then iron like crazy!  Use steam if you can, you want to get a good crisp fold...
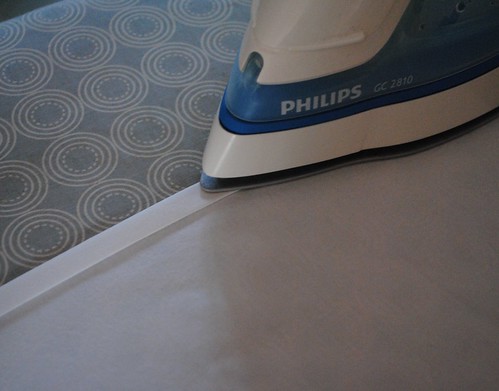
25. Making the back pieces

I usually pop a couple of hefty books on top after I've ironed and whilst the fabric is still warm, just for a few minutes, it helps the fold stay flat as it cools.

Now you need to sew the fold in place.  How you do this is up to you - I am using matching white thread to sew one long straight line, but you could use a contrasting thread and sew two parallel lines, or a wavy line even, if you want it to be more decorative...

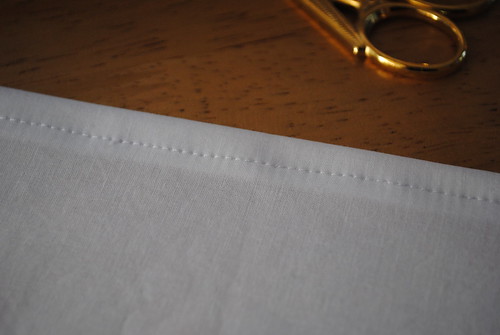
26. Making the back pieces

27. Making the back pieces

Now to the same thing to the other back piece...
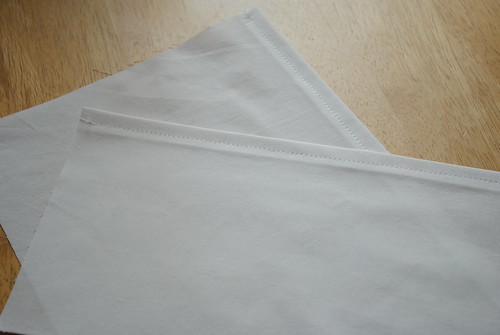
28. Making the back pieces

Now take one on your back pieces (doesn't really matter which one) and pin it right sides together on top of your completed front piece.  Line up the long raw edge with the bottom of the front piece...
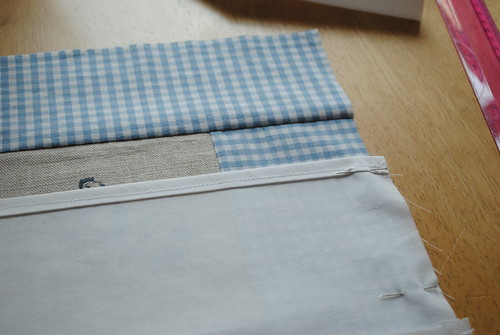
29. Attaching the back pieces

Now take your second back piece and place it right side down on top of both the front piece and the back piece you already pinned.  Line up the long raw edge with the top of the front piece, the two back pieces should overlap...
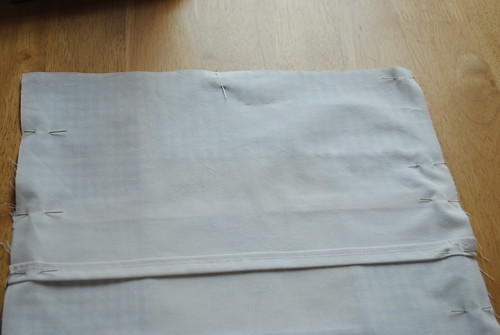
30. Attaching the back pieces

Now sew all around on every side (no need to leave a gap for turning as we will use the envelope opening).  Then carefully snip little cuts into the seam allowance at the corners to reduce bulk...
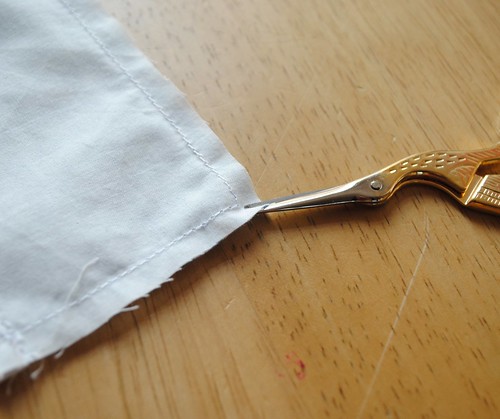
31. Sew and snip

Now turn it right side out through the envelope opening at the back...

32. The exciting part...

Use your finger, or a blunt object like the end of a pencil, to push out the corners fully.  Then stuff your cushion pad in through the envelope opening...

33. Stuff!

Now give it all a good pooph about and a shake to get it all fitting into the corners and sitting nicely and...


34. Admire...

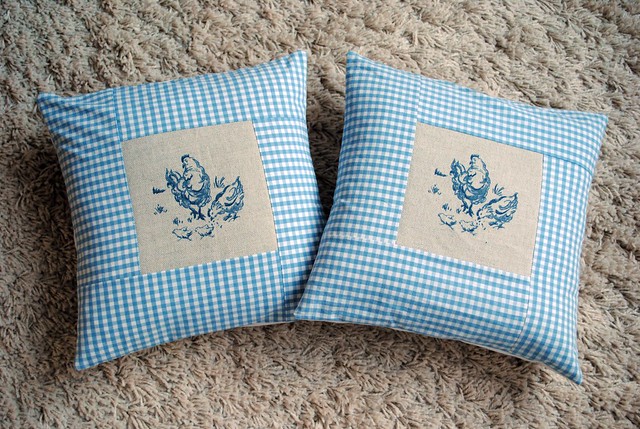
Ta da!  Stand back and admire your hard work! How easy was that?  So easy in fact why not do what I did and make two!..

36. Finished Cushion Covers

This really is a simple little cushion cover to make, you could do one in a couple of hours at most. Give it a try!

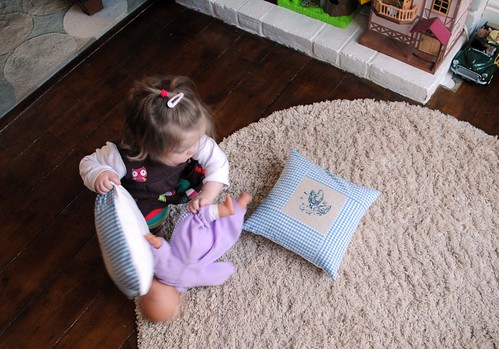
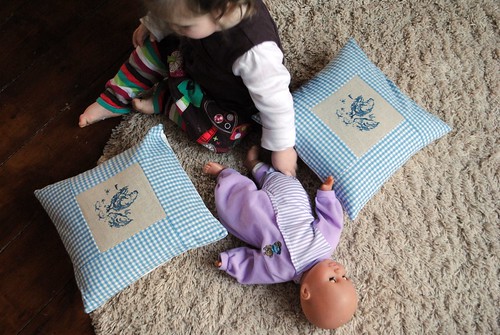
And now I will reveal how difficult it is to photograph the finished articles with a 1-year-old minibeast running about the place...

Phoebe prefers to play rather than sew :)

Particularly when that minibeast prefers to use the cushions as a bed for her baby doll...

Phoebe prefers to play rather than sew :)

Phoebe prefers to play rather than sew :)

Enjoy making your own cushion! And don't forget to let me know how you get on!

:)

xx